

How to Retrofit Ventilation Holes to your ABS
Here are instructions on how to retrofit ventilation holes to your Graphite ABS that look good enough to have been placed there by Apple. John Yeh was the first to send me detailed instructions, which have since been updated by John Siberian and Greg Branche. I would like to thank all three for their work and for permission to host their content on my site.
As with all other content on this site, you'll use it at your risk alone. If you break something, hurt yourself or someone else, etc. it's your responsibility, not mine.The three pieces you'll be modifying are the bottom of the carrier, the underside of the base station, and the kidney piece mounted underneath the telephone jack. Only drill individual pieces with proper support and a expendable base (such as a scrap piece of wood) that you do not mind drilling odd holes into.
Here is a list of items that you'll need:
- Drilling Template for exterior (a PDF thanks Greg Branche!)
- Clear tape
- Drill with a 3/16" (5mm) drill bit
- Piece of scrap lumber (to drill on)
- Optional but useful: Deburring tool or thin round file
To begin, you should print out the excellent templates that Greg Branche has created. Cut the three outlines out of the paper template (leave the vent holes for later). Next, clear a small table to work on. That way you'll have a place to set the screws and pieces you'll be removing from the ABS.
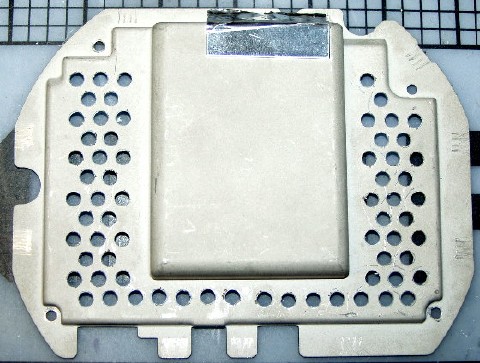
Now you're ready to start the process of adding holes to the bottom of the ABS. Start by removing the bottom of the ABS (three Philips-head screws hold it). Then use the tape to temporarily fasten the template to the underside of the base station. Now you're ready to drill the vent holes, just remember to have something expendable underneath (like scrap lumber) so you don't damage the table.
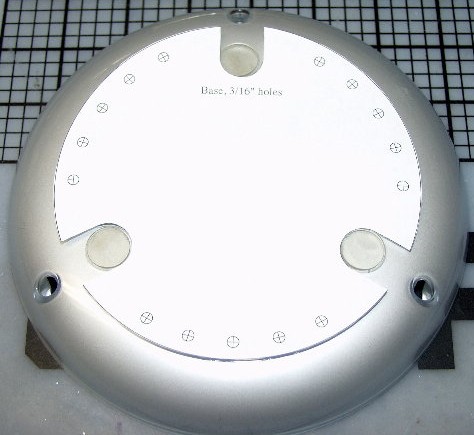
When you're done drilling the bottom of your base station shell, it should look a lot like the following picture:
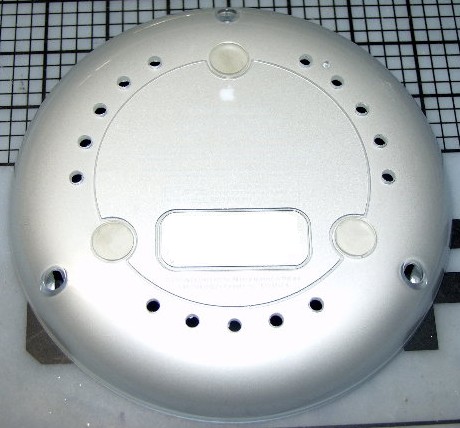
Clean out the holes to ensure that no stray bits of plastic are hanging off to the side (also known as burrs). Here, the deburring tool, file or even a knife can be used to ensure that all holes are burr-free.
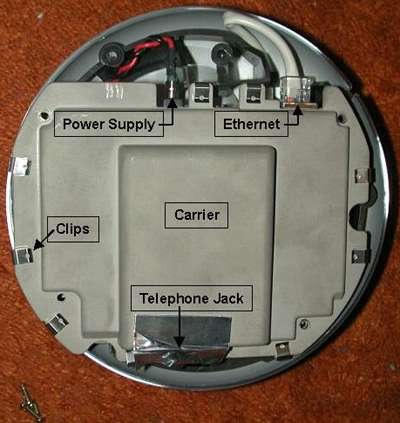
Next, remove another three screws from inside the ABS to unfasten the Carrier piece. Before you can remove the carrier though, you have to peel up the silver tape to undo the telephone connector. Next, undo the ethernet and power plugs. Now you should be able to pull the carrier out of the ABS with a minimum of fuss.
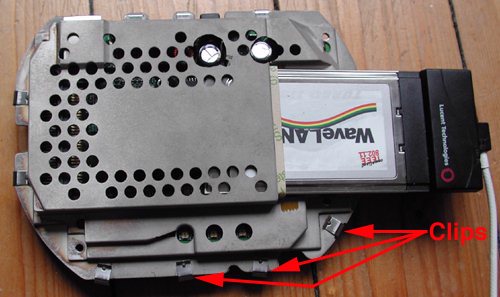
Now that you have the carrier out of the base station, continue by pulling out the PCMCIA WaveLan transmitting card and undoing the clips around the perimeter. Once all the clips are off, you should be able to take the carrier apart. Before you do that though, ground yourself while touching the carrier.
Flip the carrier on its top and place it on the table. Now you can pull off the bottom half of the carrier without touching the motherboard. Place them and the remaining ABS parts away from the table as the shavings you're about to produce are conductive and could short out the ABS later. Affix the template to the carrier card with tape. You should end up with something like this:

Then drill the vent holes and be very careful about deburring them. They have to be clean - the plastic used for the carrier pieces is conductive. Thus, any burr could short out your ABS and destroy it. Once you're done drilling and deburring all the holes, sweep the shavings straight into a trash can.
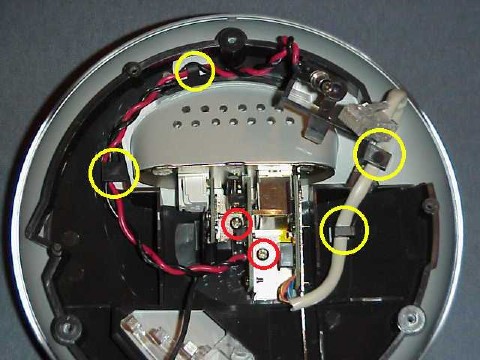
Reassemble the carrier with its clips, then reinsert the PCMCIA card. Set the carrier aside, and pull out the top of the ABS. The remaining holes will be drilled into the "Kidney" which is mounted into the top of the ABS. You can remove the Kidney by undoing the two screws circled red in the following picture. Undo the cable routing, and the "Kidney" should pop out.
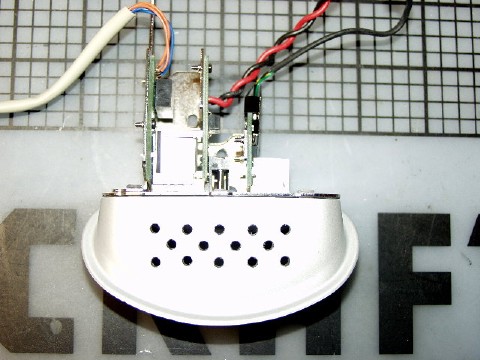
Affix the template to this piece and you should see something very similar to the following image.

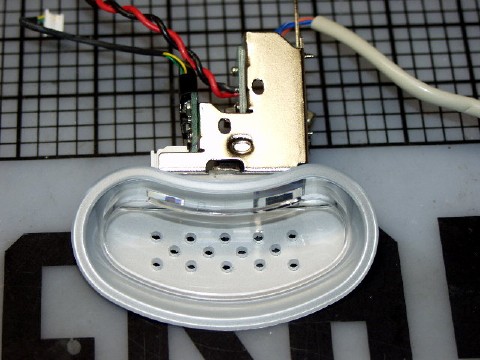
Once you're done taping up the template, drill away. Deburr these holes as well and you should see something like this:
Now reinstall the kidney back into the ABS. John Yeh recommends putting the wires back into their holders before tightening the screws. Re-connect the power and ethernet wires inside the ABS to the carrier board before sliding the carrier back into the upper shell. Next, reconnect the telephone jack and bend the foil back over the hole.
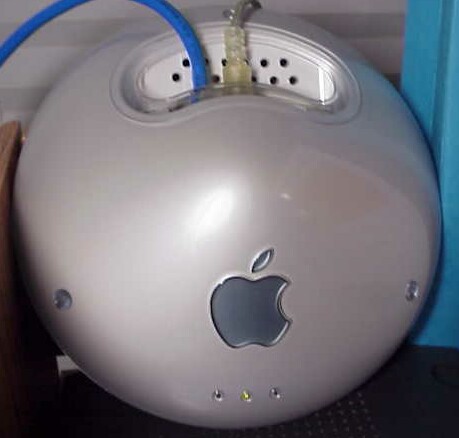
All that remains now is to attach the carrier to the upper half of the ABS enclosure (3 screws) and to reattach the two base station enclosures to each other (3 screws as well). Go ahead and fire up the ABS. You should see something like this:
If you'd like to increase airflow even further, John Yeh recommends adding rubber bumper feet to the bottom of your ABS (Radio Shack Cat.#: 64-2365 or equivalent)
Please remember to thank John Yeh, John Siberian and Greg Branche in particular for their contributions!
Cheers, Constantin